Quick start
This walkthrough goes from nothing to a live response using the public Swagger Petstore API: it has an OpenAPI spec you can import and a live server you can call.
You'll set everything up in the desktop app, then run requests from the app or the craftrCLI. The rule of thumb: author in the app (importing specs, declaring variables,
creating requests); use the CLI to run and automate. Make sure you've
installed the app first.
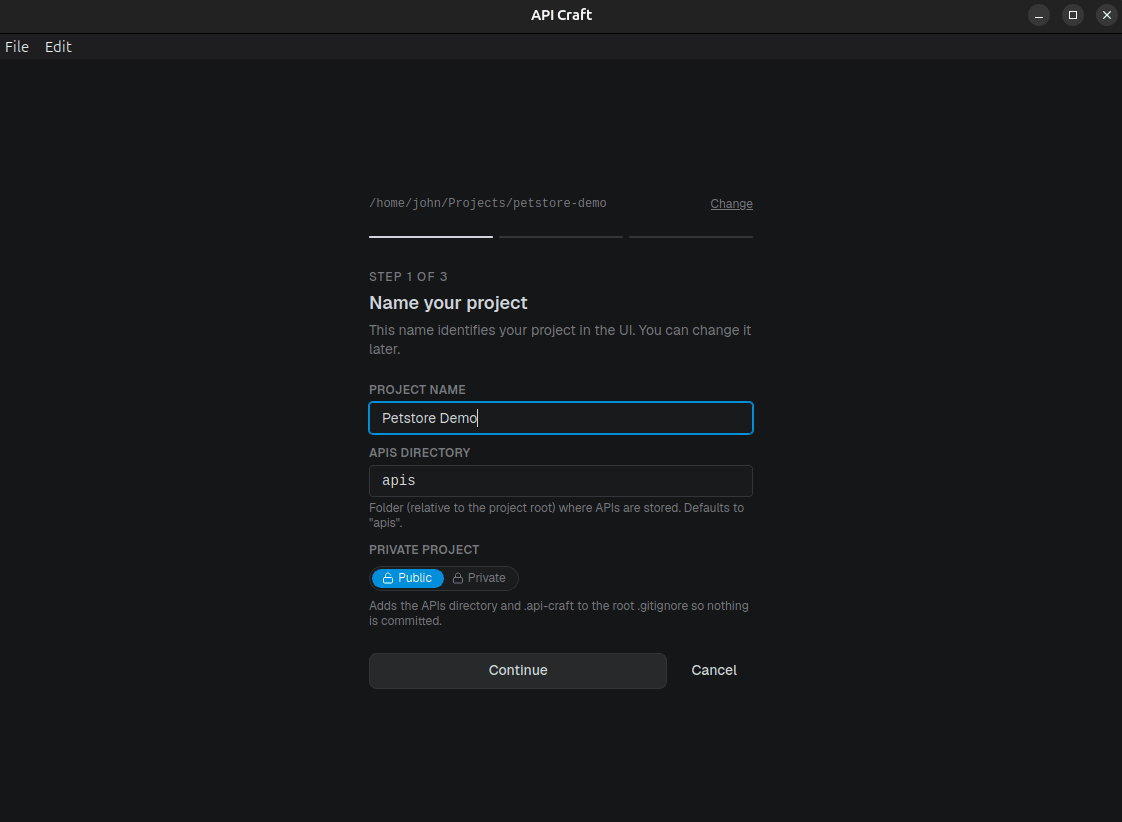
1. Create a project
Launch API Craft and create a new project, pointing it at an empty folder. This folder is the project. Commit it like any repo.
2. Import the spec
Start the New API wizard. Give the API a slug (petstore-api) and import the spec by URL:
https://petstore3.swagger.io/api/v3/openapi.json
The wizard imports the spec, maps operations into resources, and lets you review the mapping before finishing.
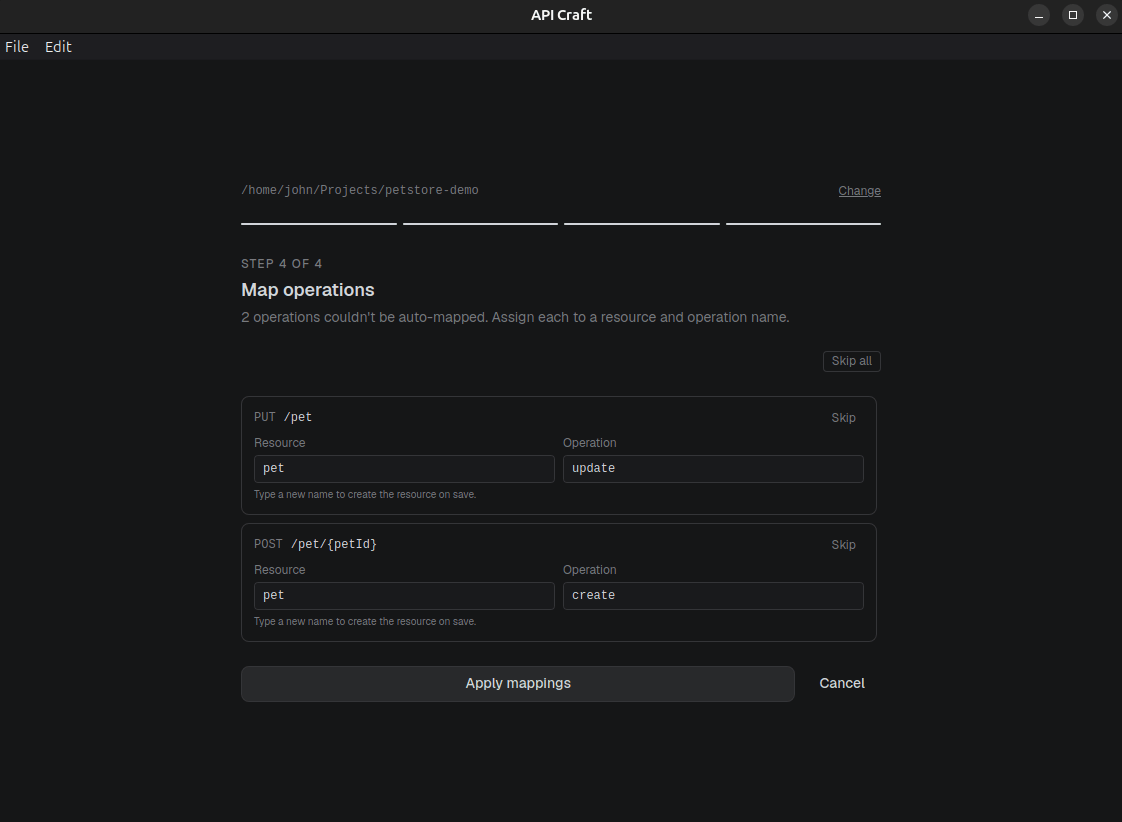
Some operations import as unmapped; that's expected. The heuristics map what they can; you map or ignore the rest from the schema sidebar. See Importing a spec.
3. Declare the environment variables
Requests resolve their host from a variable, and a variable must be declared before it can hold a value.
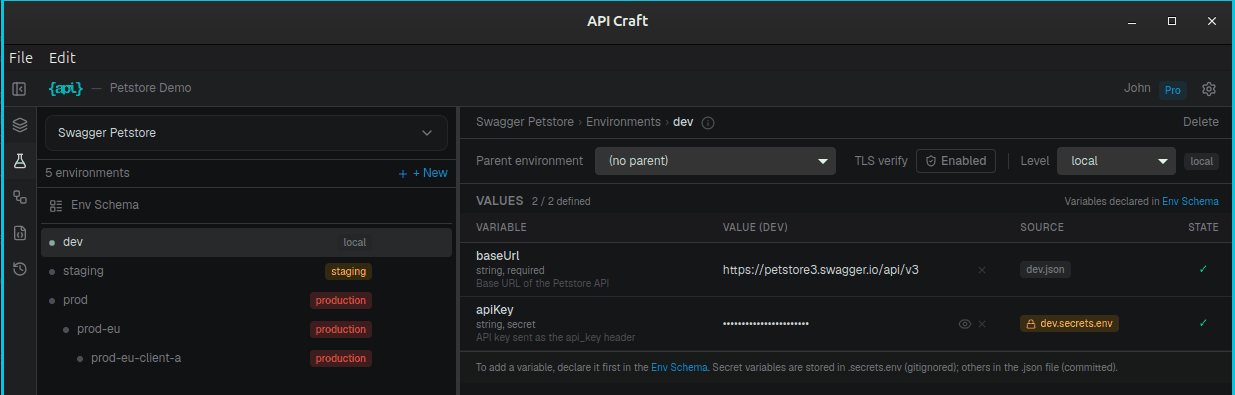
- Open the environment panel (
Alt+2) and use the schema editor to declare abaseUrlvariable (string, required). - Give the
devenvironment a value forbaseUrl:https://petstore3.swagger.io/api/v3.
Do the same for apiKey, but declare it as a secret so its value lands in the gitignored
dev.secrets.env instead of the committed environment file. Petstore accepts any value.
4. Configure the API
Importing a spec doesn't configure the API: every new API needs this once. Select the API in the schema sidebar and open its Config tab:
- Base URL: set it to
{{baseUrl}}. It is not filled in from the spec'sserversentry: pointing it at a variable is what lets one API run against dev, staging, and prod without editing a file. - Default Auth: pick
API key, inheader, namedapi_key, with value{{apiKey}}(what Petstore expects). Bearer tokens and custom script auth are the other options.
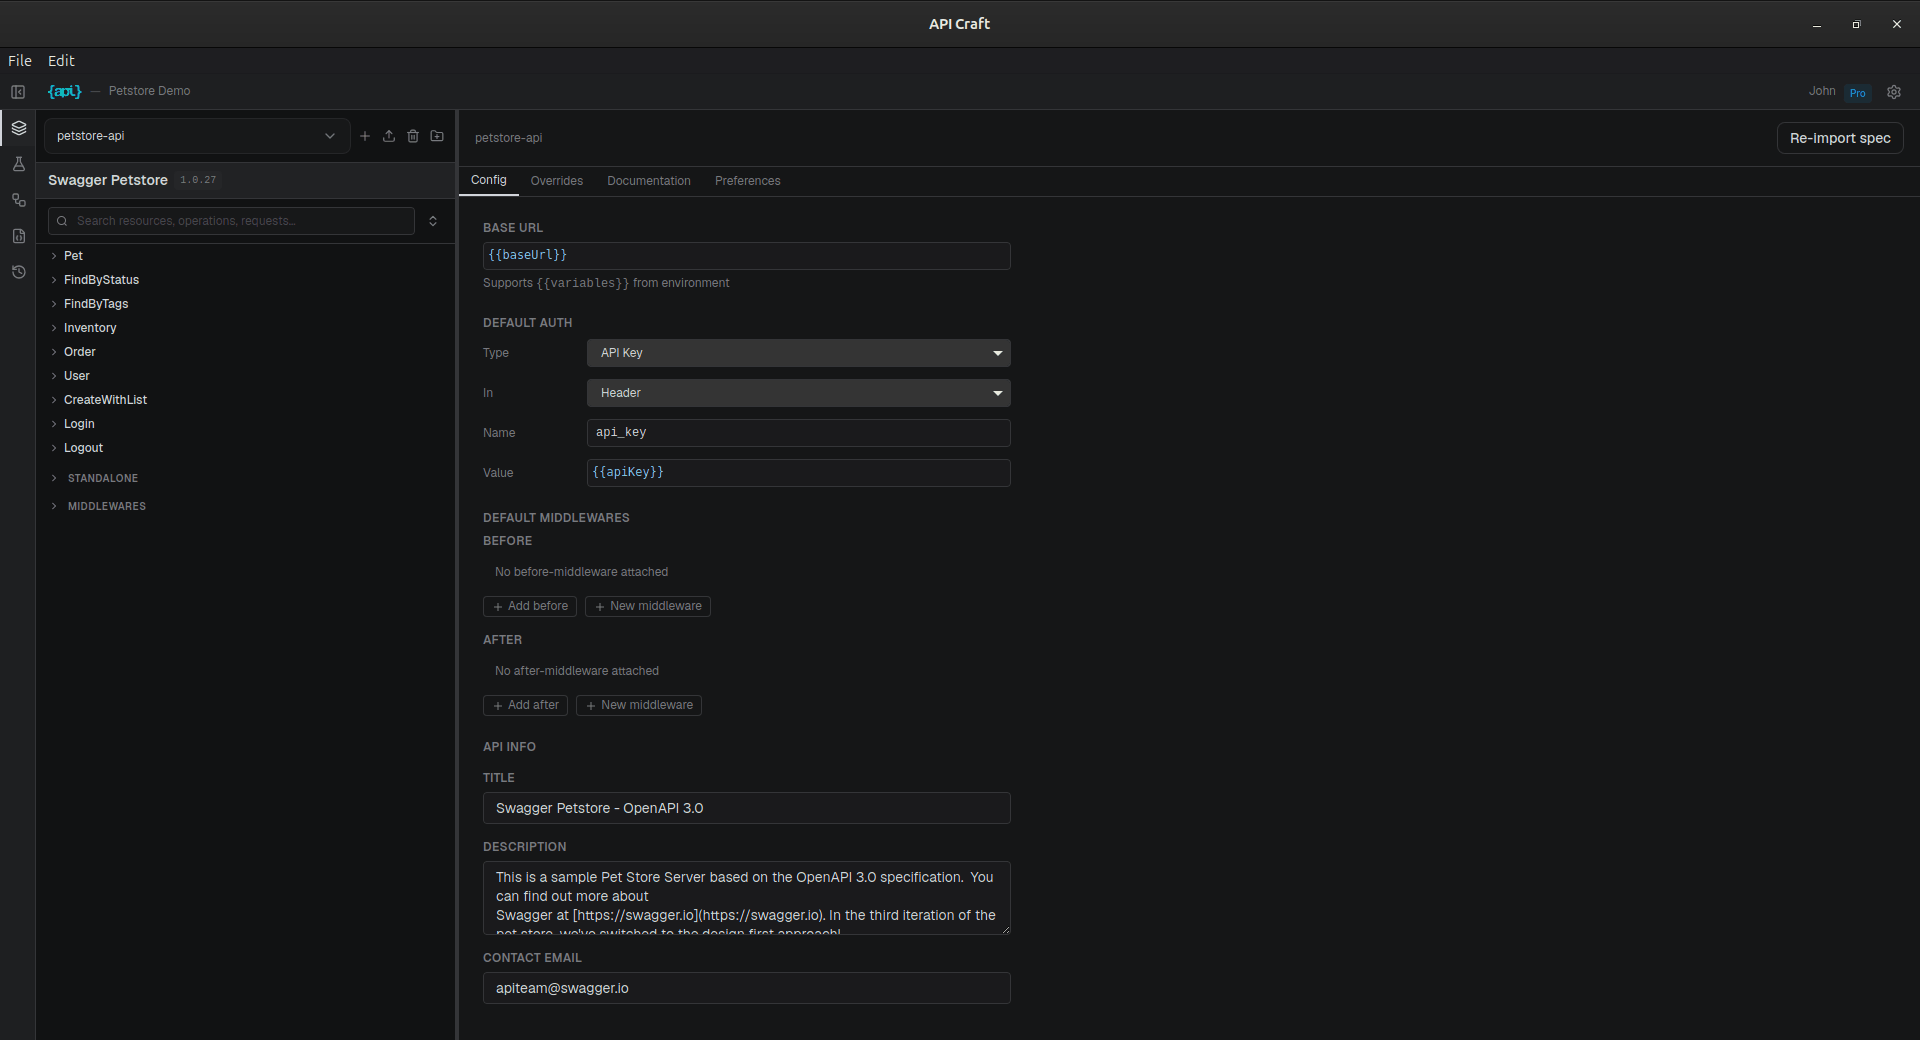
Both fields take {{variables}}, so no host and no secret is ever written into a committed
file. The default auth is copied into new requests as you create them; it seeds them
rather than wrapping them, so changing it later leaves existing requests untouched. See
request instances.
5. Run your first request
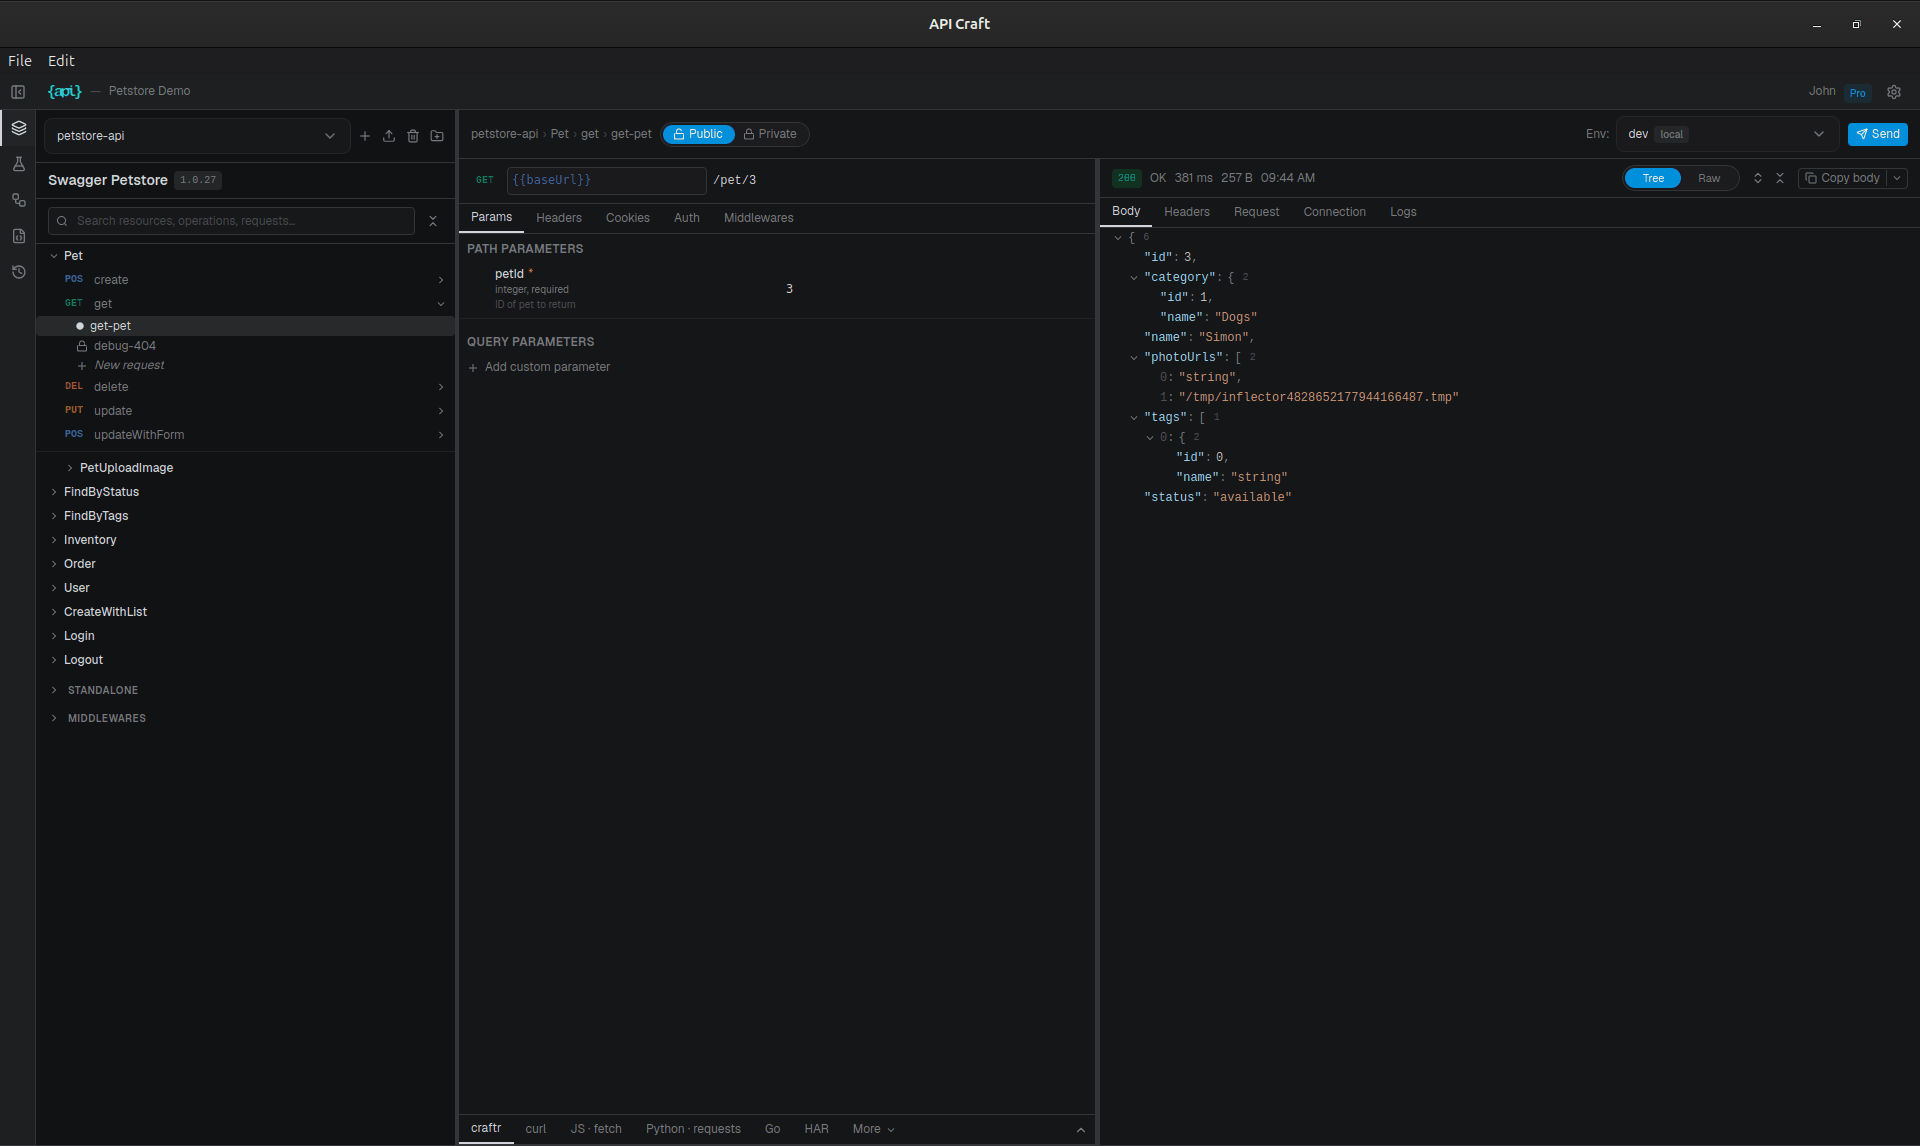
In the schema sidebar (Alt+1), expand the Pet resource and click the get operation
(GET /pet/{petId}). Enter 3 for petId, pick the dev environment in the top bar, and
press Ctrl+Enter. The response appears on the right and is saved to history.
Press Ctrl+S to save the request as a reusable instance and name it get-pet.
6. Run it from the CLI
A saved instance is just a file, so the CLI can run it against the same project, ideal for scripts and CI:
craftr req run Pet/get-pet -e dev
{"id":10,"name":"Rufus","photoUrls":["example.com"],"tags":[]}
The body prints to stdout, so it pipes straight into jq:
craftr req run Pet/get-pet -e dev | jq '.name'
Project scaffolding and spec import are scriptable too (craftr project init, craftr api create,
craftr schema import), which is handy in CI. The CLI focuses on running and automation;
authoring (declaring variables, creating requests) lives in the app. See the
CLI reference.
What next
- Concepts: the model behind resources, instances, and environments.
- Request instances: overriding params, visibility, running from CI.
- CLI reference: every
craftrcommand.